RG-EG3000 Series Quick Start Guide


EG3000Series Quick Start Guide
[EG3250, EG3000UE/XE Model]
1. WAN Uplink Quick Setup
1) Modify the IP address of PC.
IPaddress: 192.168.1.x (except 192.168.1.1)
Subnetmask: 255.255.255.0
Defaultgateway: 192.168.1.1 (default LAN IP)
2) Connect the PC to any port (except WAN0)on the device.
3) Visit http://192.168.1.1by Chrome browser.
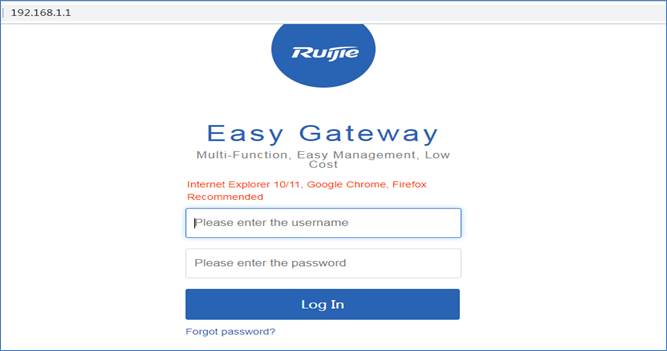
4) Enter the username and password on thelogin page and click “Log In”.
DefaultUsername: admin
DefaultPassword: admin
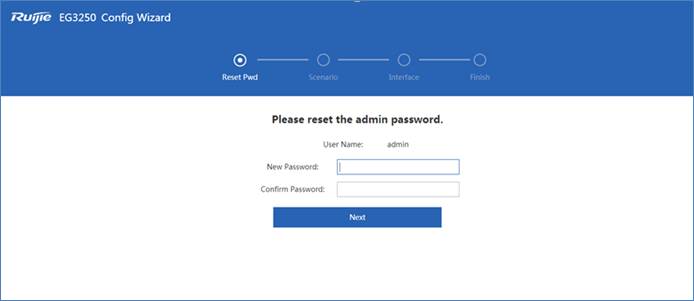
5) Change the password at the first login.
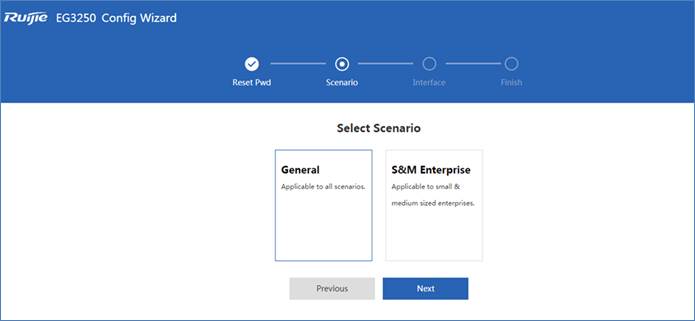
Select a scenario.
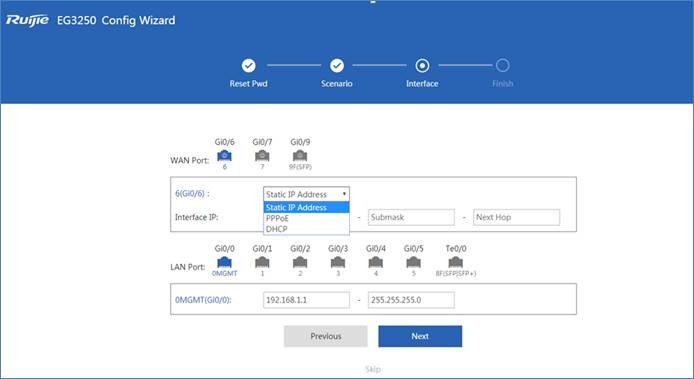
Configure the WAN port (DHCP, Static IP orPPPoE).
It is not recommended to change the IP ofLAN port; otherwise, you may need to log in and configure again. After wizardcompletes, you can configure LAN port on the interface configuration page.
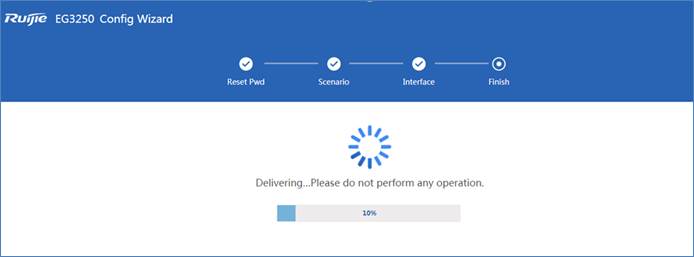
6) Click Dashboard to open thehomepage, or click Interface to enter the interface configuration page.If the WAN port is connected to the Internet, you can access the Internet nowand add the EG to the Cloud.

1.Add Device to Ruijie Cloud
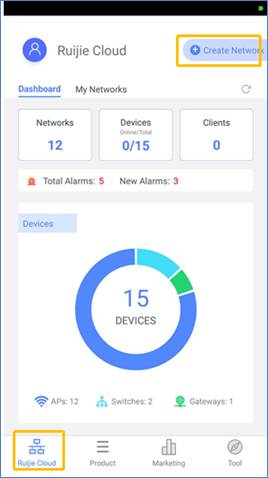
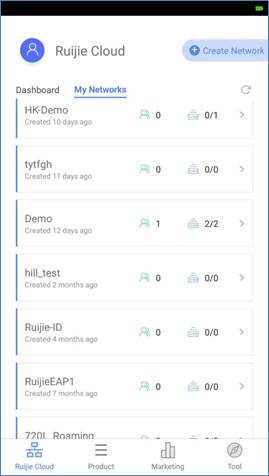
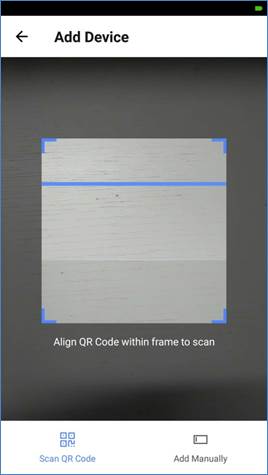
1) Open the Ruijie Cloud App, tap Create Network, and enterthe network name and SSID.

2) After the network is created, enter thenetwork and tap Add Device to add AP and EG3250 by scanning the QR code(AP SN/MAC) on the back of the device (Note: There is no QR code behind EG3000UE/XE,so please manually enter SN). When adding an EG, you need to enter its Webmanagement password.
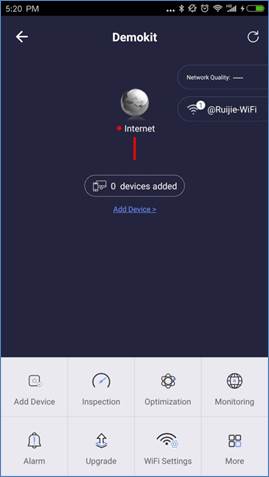
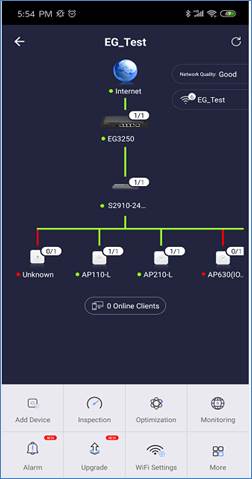
3) Wait for about 3 to 5 minutes, and youcan see the online status of EG device.
The SN/MAC QR-Code demo on the back of EG:

1.Access EG Web from Cloud
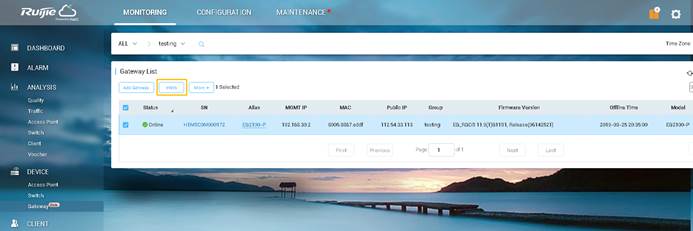
1) After an EG comes online on the RuijieCloud, you can visit its eWeb page for advanced configuration. Select the EG inthe Gateway List, and click eWeb.
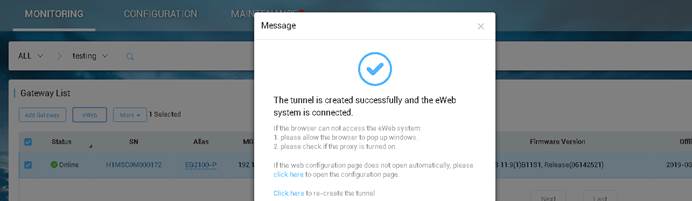
2) After the tunnel is created, the Webmanagement page will open automatically, as shown below:
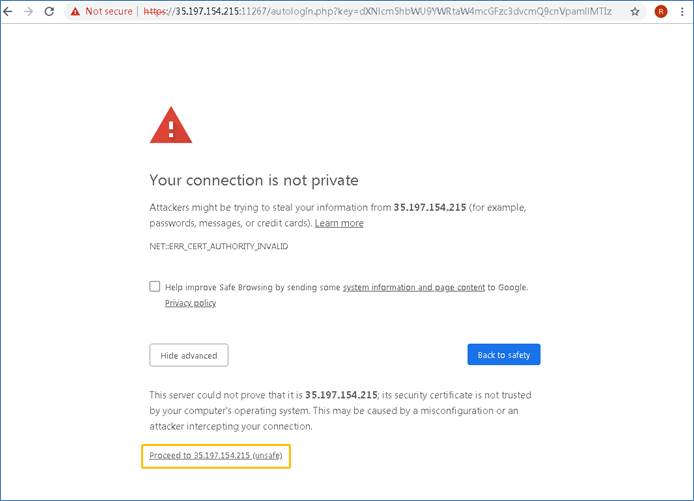
3) If the following information isdisplayed, click Proceed to enter the eWeb system.
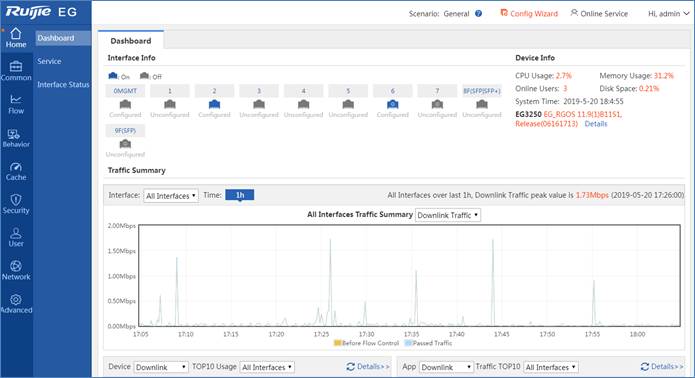
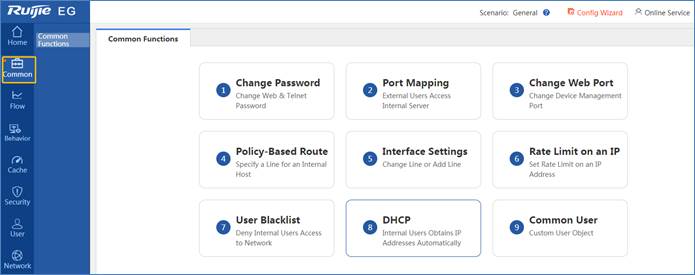
1.Common Functions
Click Common on the menu forcommonly-used functions.
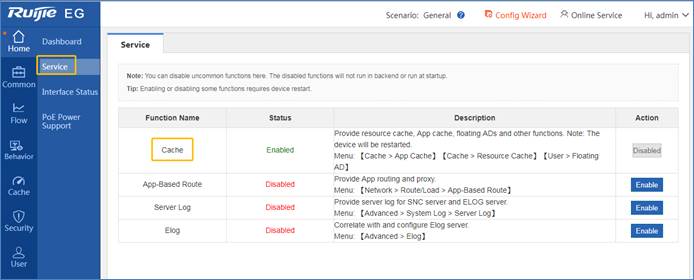
1.Cache Configuration
EG supports static resource (such as image,video and file) cache and App cache (both on iOS and Android).
Cache is disabled by default. You canenable it in the Service menu (device will restart).
1.1 ResourceFile Cache
Static resources, including files, imagesand videos, can be cached on EG.
Step1: Set upone HTTP server and upload the file to be cached.
Step2:Enable the cache, and input the resource address (MUST be based on HTTPresource).
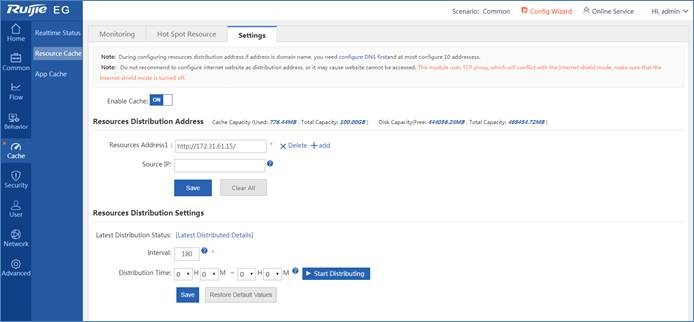
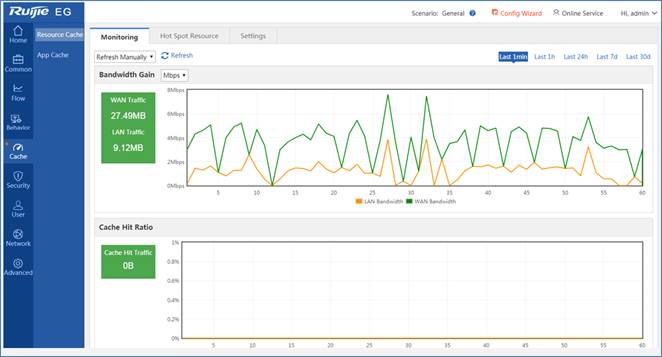
Example
When cache is disabled, the traffic mainlycomes from WAN:
When cache is enabled:
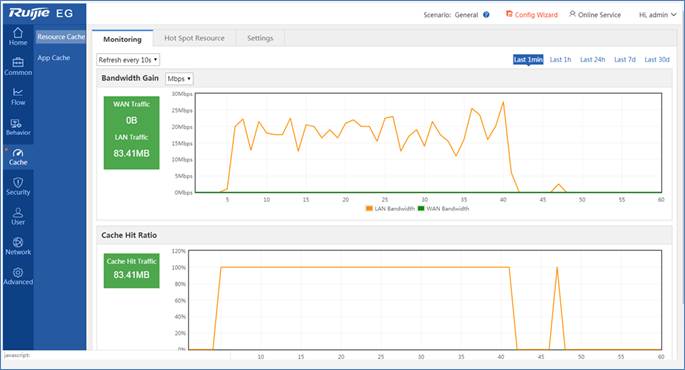
As the file is downloaded from cache, theWAN traffic throughput is lower and the Internet bandwidth is saved. Even whenthe Internet bandwidth is limited to 0.5 Mbps, the download speed can reach 15.5MB/s(124Mbps).
1.2 iOS AppCache
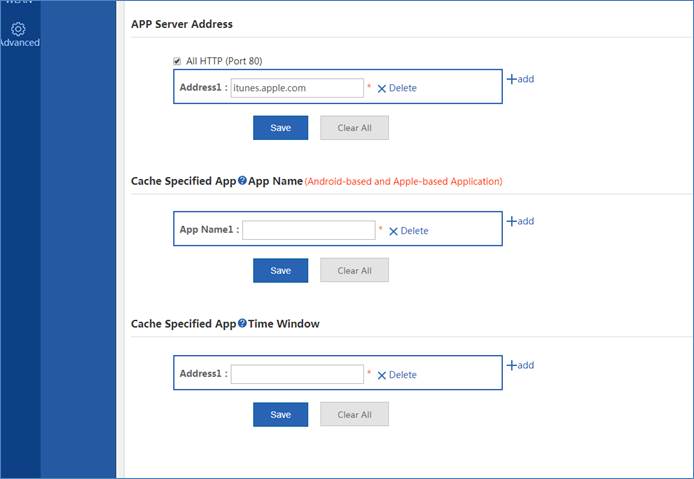
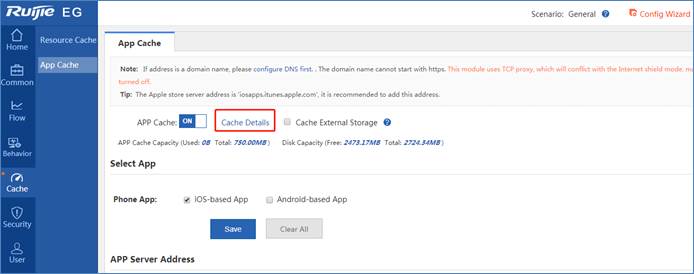
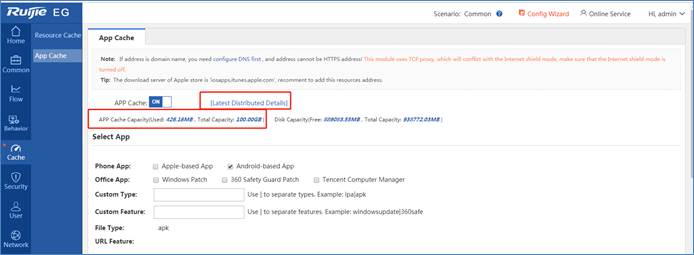
Step1: EnableAPP Cache and select iOS-based App.
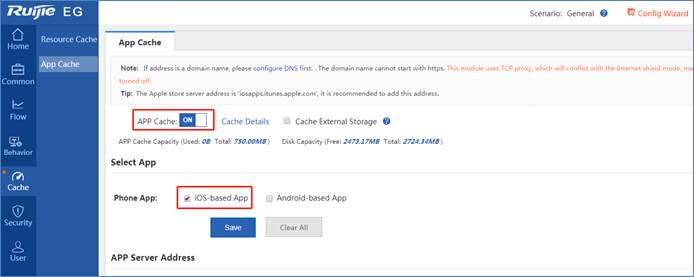
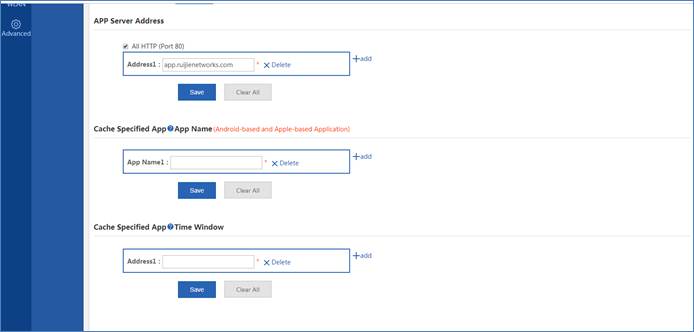
Step2: Enterthe App server address and enable all HTTP. Keep the App name and App addressempty.
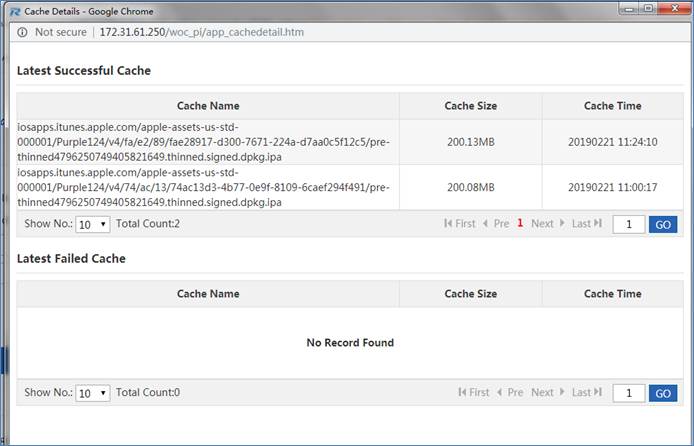
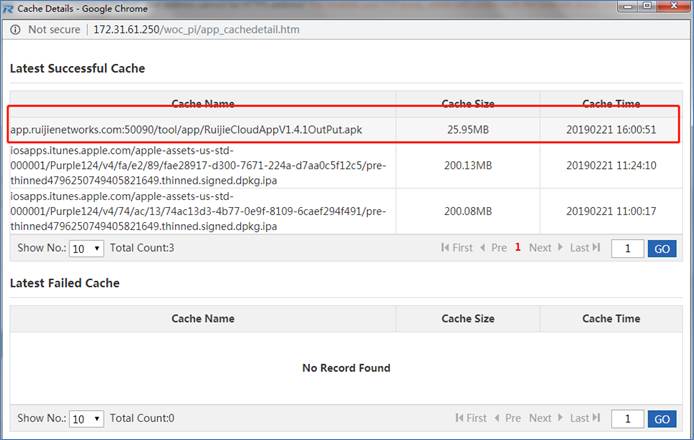
Step3: AfterSTA begins to download the App from App Store, you can check the EG cachestatus.
EG caches the App when the STA downloadsthe App for the first time.
Note: URL in iTunes varies with iPhonemodel.
1.3 Android AppCache
EG supports Android APK download link (Note:Google Play is not supported).
Step1:Enable APP Cache and select Android-based App.
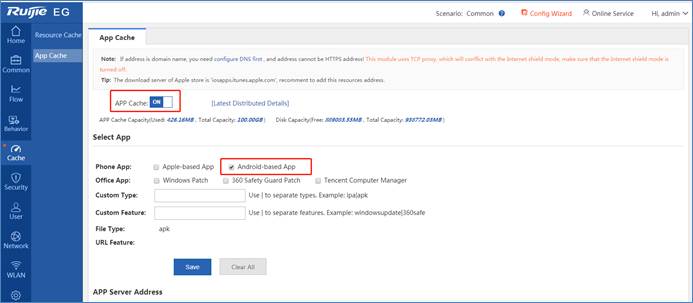
Step2: Enterthe App server address and enable all HTTP, as shown below:
Step3: STAbegins to download from the above link.
EG caches the App when the STA downloadsthe App for the first time.
When other STAs download the App again inthe same network, they will get App from EG Cache.

 Thank you. We will inform you of our response as soon as possible.